As I peruse the internet (namely Etsy, Ebay, and various blogs), I’m noticing that there are a lot of really bad product shots happening. I’m talking dark photos, blurry photos… or you just really can’t see what it is the person is trying to sell.
Whether you’re a blogger or brand spankin’ new entrepreneur, there really is no reason for awful photography. I’m not saying that everyone has a pro photographer in them, but allow me to give you a few tips.
(All of you professional and newbie amateur photographers, stop reading now. I’m using my getto gorilla style methods and this may pain you to see).
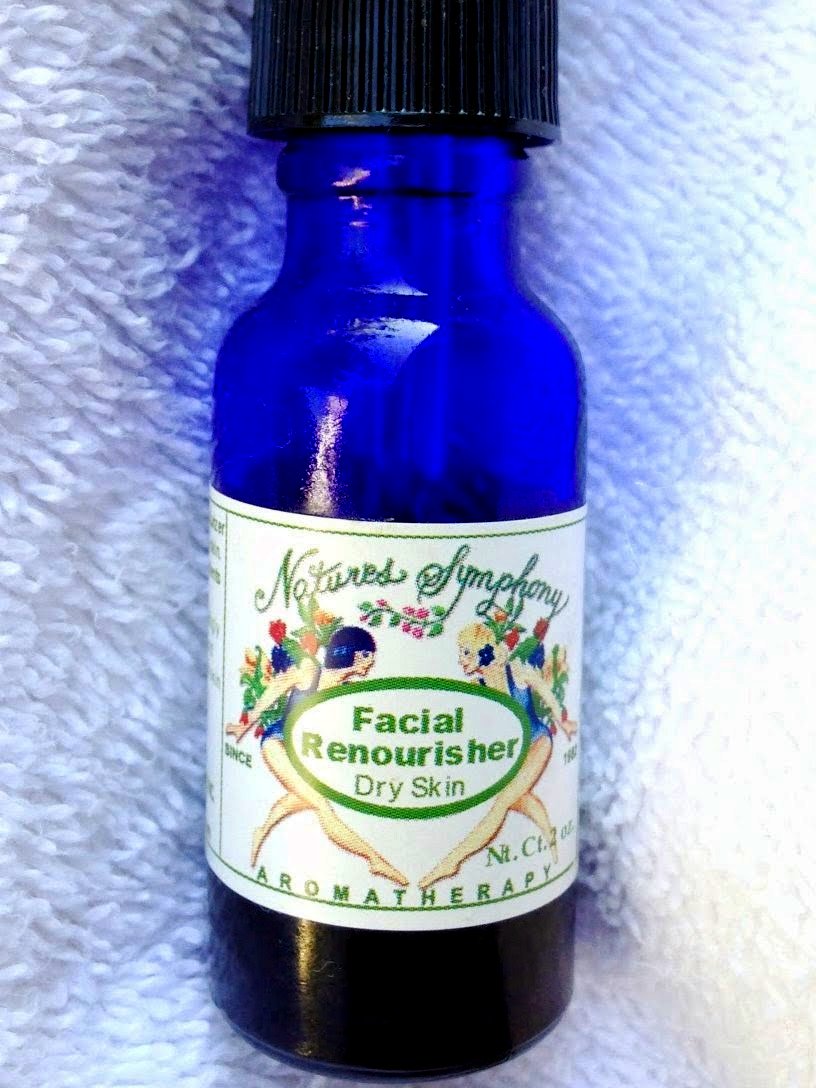
 (Product shot I took this of my favorite night skin oil from a little shop down south in Boca Raton, FL. This was taken with my iPhone at about 9am this morning in the shade.)
Here are a few very low budget methods and steps in taking a product shots for your small business or blog:
The camera: You don’t need a professional camera to take photos. Get started with your smart phone or even your cheap Kodak point & shoot will do the trick (if you can turn the flash off). It’s amazing how beautiful iPhone photographs come out.
Lights: You can get by without one of those fancy shmancy light kits, just photograph your items outside. Lighting is best in the early morning, late afternoon just before dusk, and on cloudy days. On cloudy days, clouds act as filters and distribute the light more evenly, therefore omitting ugly shadows. We don’t want dramatic shadows in your product shot. We want attractive, softly lit product. You want to be able to read the detail on your product.
Background: Keep it neutral. As a general rule, I use white craft paper. For this face oil product shot, I used a towel to give texture and because this product is something you usually use in the bathroom as your nightly beauty routine. There’s a good article on Etsy about styling photos and showing how they’ll be used.

Edit: There are so many easy and FREE photo editing tools available online that you can use. If you use your iPhone to shoot your product shot with, you can use instagram to lighten your photos (and promote your image/product at the same time) or use other photo apps like Phototastic, Fhotoroom, and many more. In these programs you can lighten your image by increasing the exposure if you get a dark shot or shadows. Bump up the contrast to bring more depth and color. Even your gmail (Picasa) or Google+ account offers a totally free photo editing suite for you point and shooters. Just go into the “picture” area of your Google+ account and upload your photo. You’ll be awestruck at what you can do with it in there. You can even crop in the Google+.
This is just to get you started on photographing your products effectively so that people can actually see what you’re trying to relay or illustrate.
Next up: how to photograph product shots once you get that mid-level Nikon or Canon.

You must be logged in to post a comment.